Difference between revisions of "HAS"
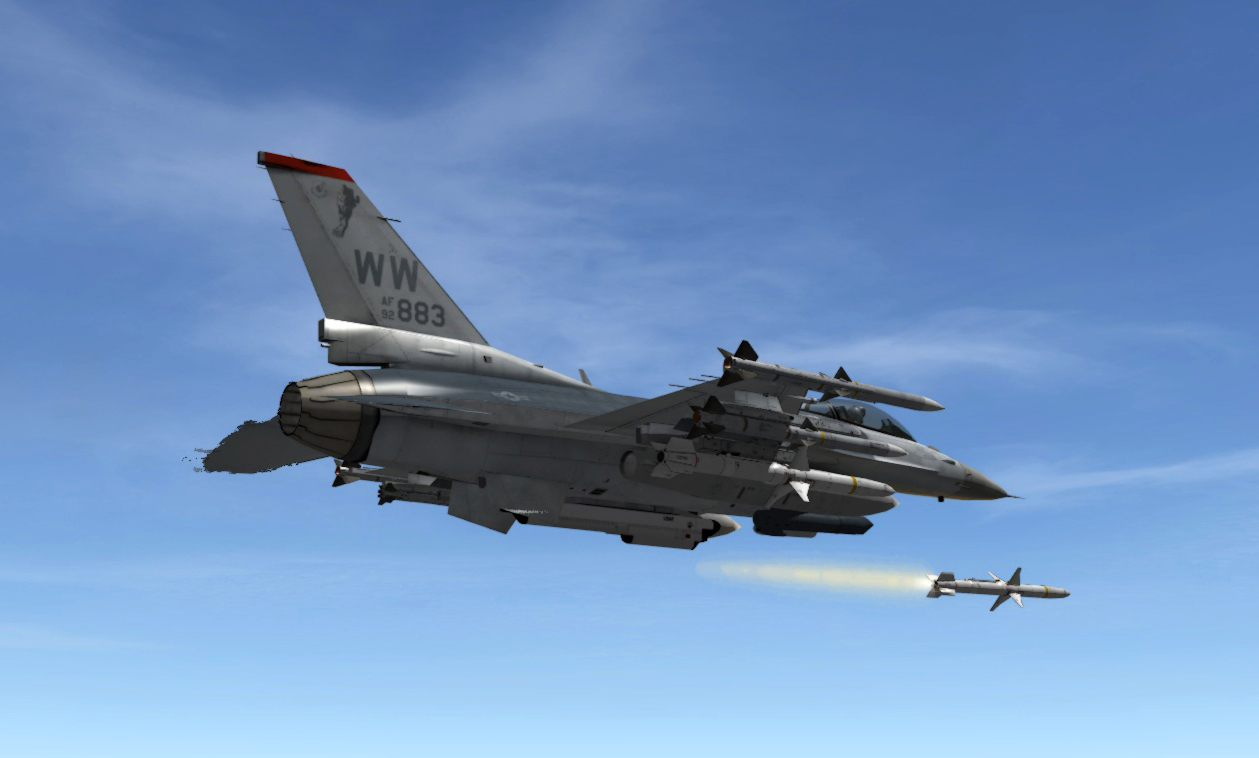
(Created page with "thumb|An F-16C Block 50 of the 13th FS fires a HARM == Overview == The HAS (Harm as Sensor) mode eliminates the need for the HTS pod and uses the HA...") |
(No difference)
|
Latest revision as of 23:38, 17 May 2018
Contents
Overview
The HAS (Harm as Sensor) mode eliminates the need for the HTS pod and uses the HARM's seeker to detect and hand off targets. As in all HARM modes, the HARMs must be powered ON via the A-G SMS page.
- Advantages of HAS
- Can easily filter out certain radar emissions when the target area is dense.
- Can be used without the HTS pod (although the HTS is always loaded with HARMs in BMS 4.32).
- Disadvantages of HAS
- Cannot tell what threats are tracking/launching.
- Filtering certain radar emissions can take time.
- No HUD symbology indicating if the target is in range.
HARM WPN Page
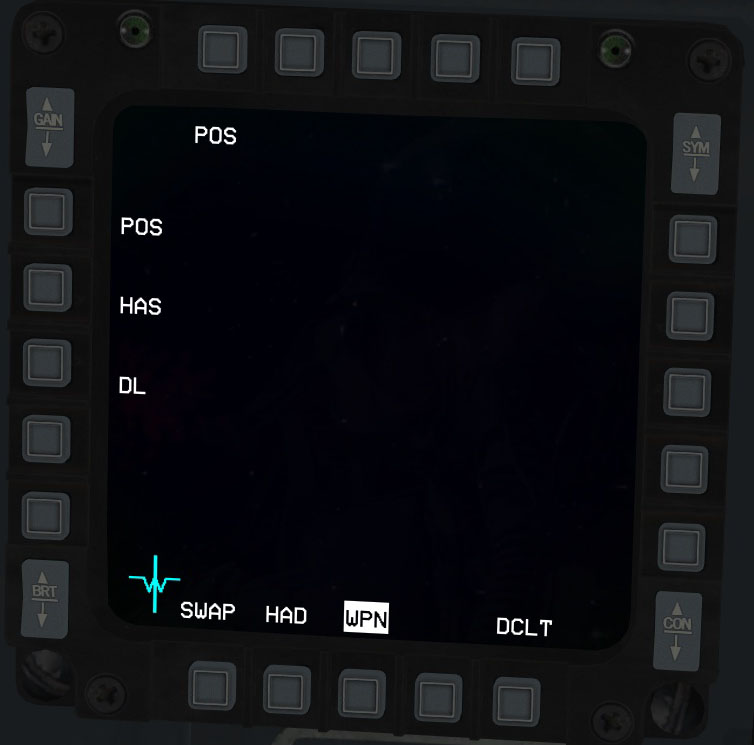
The HAS page is accessed via the WPN page menu.
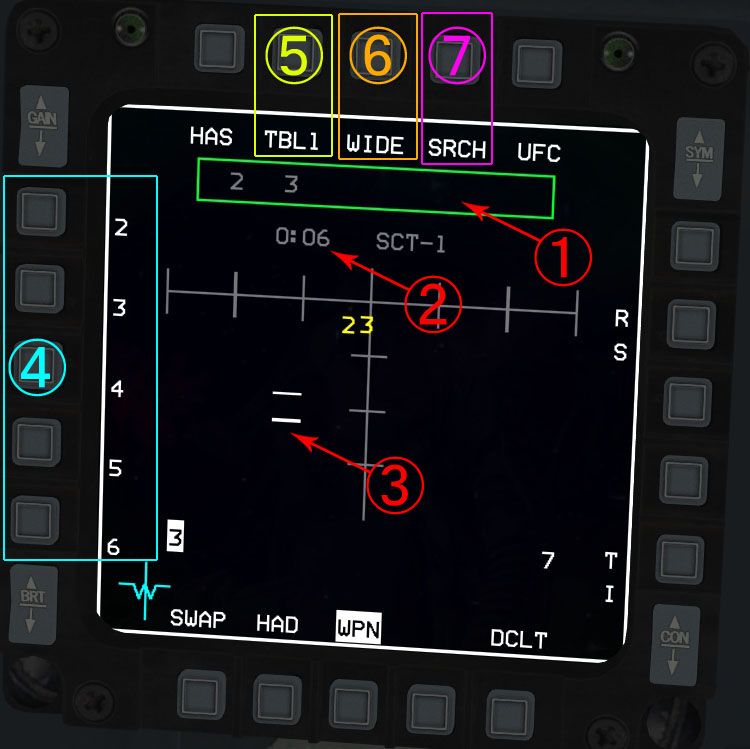
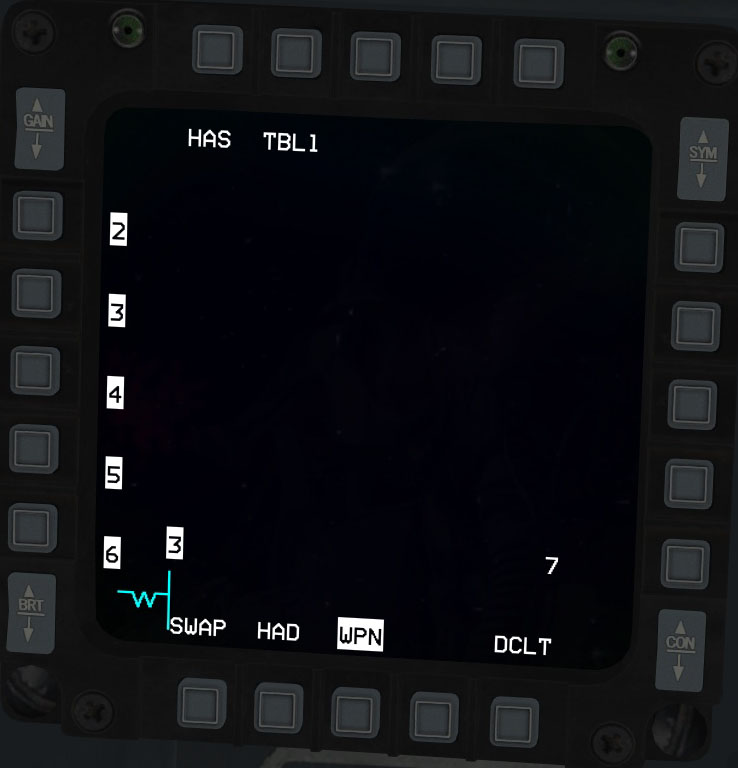
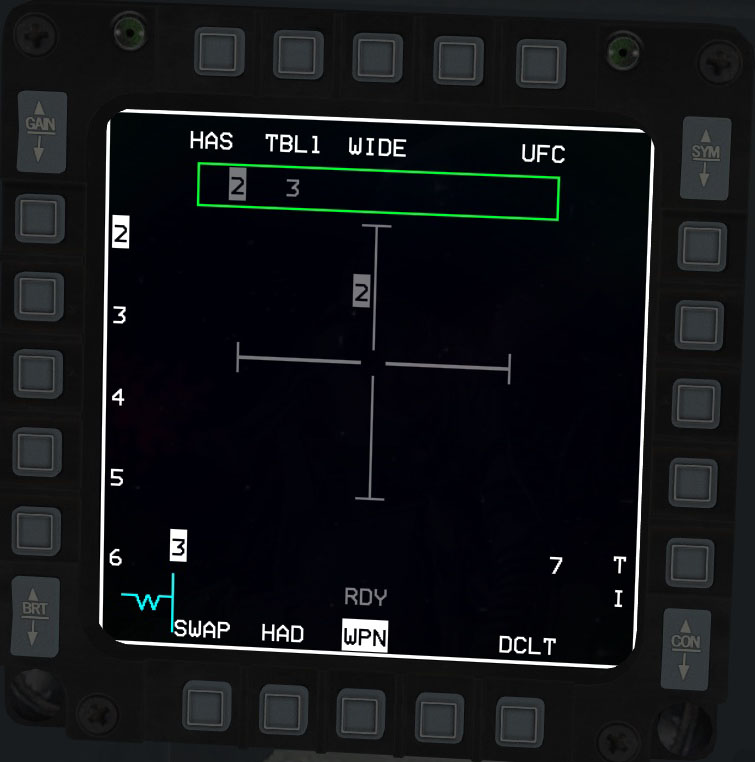
HAS Page: Definitions
- 1
- Detected Threat Status Box (DTSB). Displays currently detected threats.
- 2
- Scan time
- 3
- Cursor
- 4
- Threats in currently selected Threat Table
- 5
- Currently selected Threat Table. There are 4 Threat Tables which can be cycled by pressing the OSB or by TMS-Left.
- 6
- Scan FOV (WIDE is default). Can be cycled either by the OSB or by the Pinky Switch.
- 7
- Search function to filter specific threats.
Threat Tables
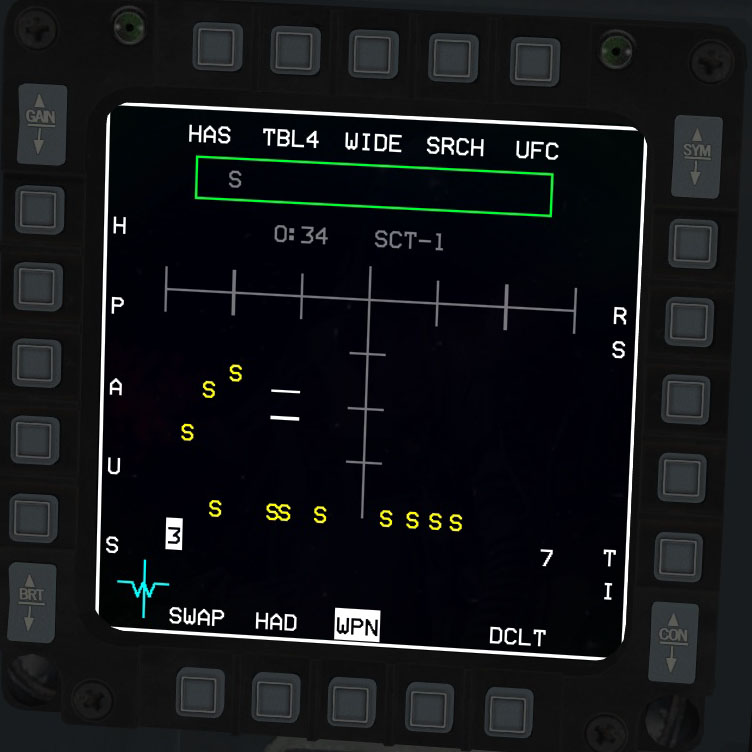
The Threat Tables, TBL1 through TBL4, can be cycled by pressing the corresponding OSB#2 or by pressing TMS-Left and contain 5 types of radar systems for targeting. The HAS will only display detected radars that are among those listed in the currently selected Threat Table. This is useful for filtering out Search radars or SAM systems that you do not wish to target (see image on left).
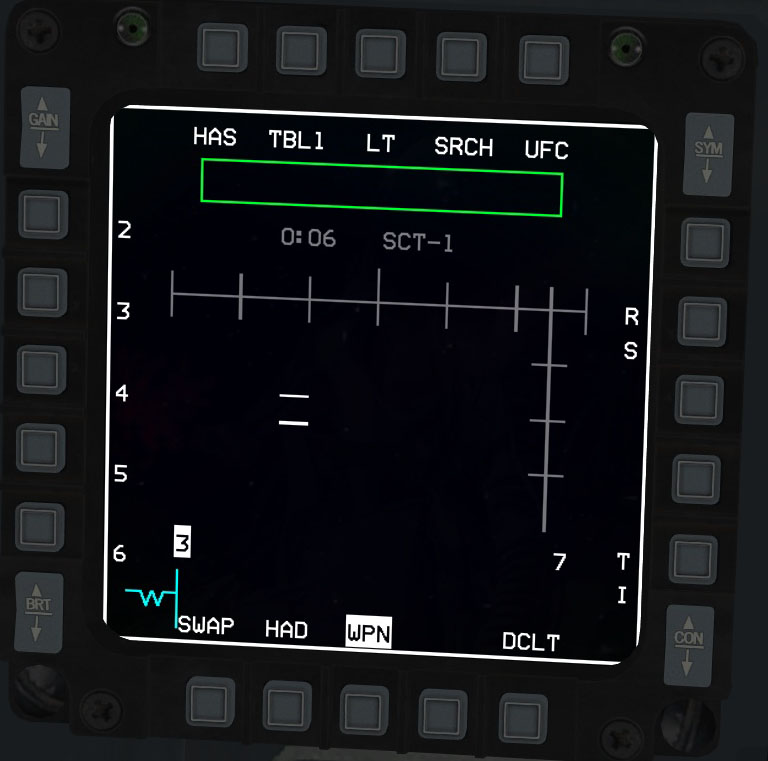
To further filter threats, you can press the SRCH OSB#4, which allows you to edit--in a way--the threats in each Threat Table (see image on right). By default all threats in each Table are selected. To deselect a threat simply press on the corresponding OSB. For example, if I deselected all threats except for 2, upon returning to the HAS page only emitting SA-2 radars will be displayed on the HAS even if other radar emissions are detected.
FOV
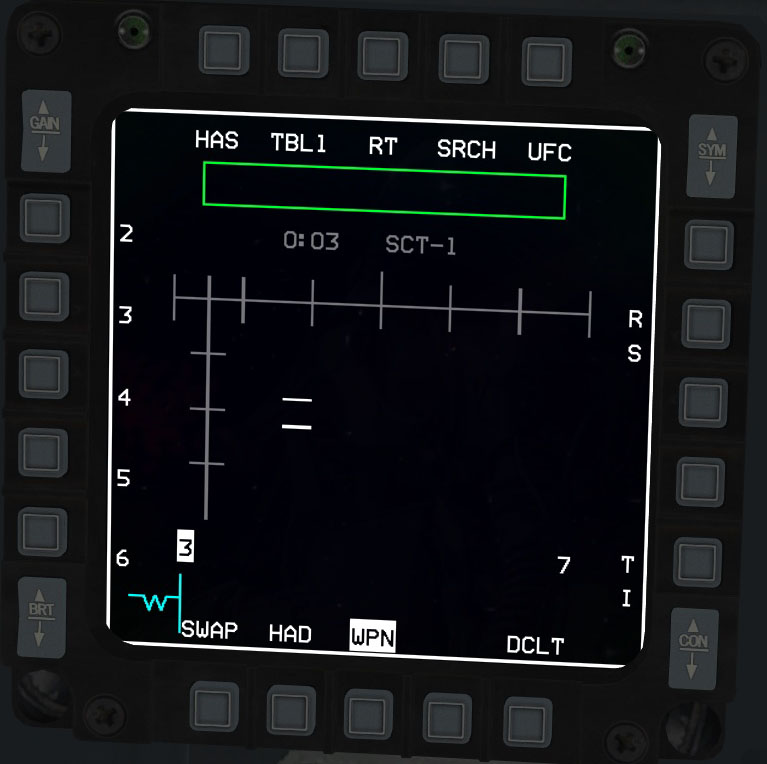
The default FOV is WIDE and provides the most scan coverage, but has a longer scan time. Left (LT), right (RT) and center (CENTER) are also available by pressing OSB#3 or by the Pinky Switch, and narrows the scan area and shortens the scan time.
HUD Symbology
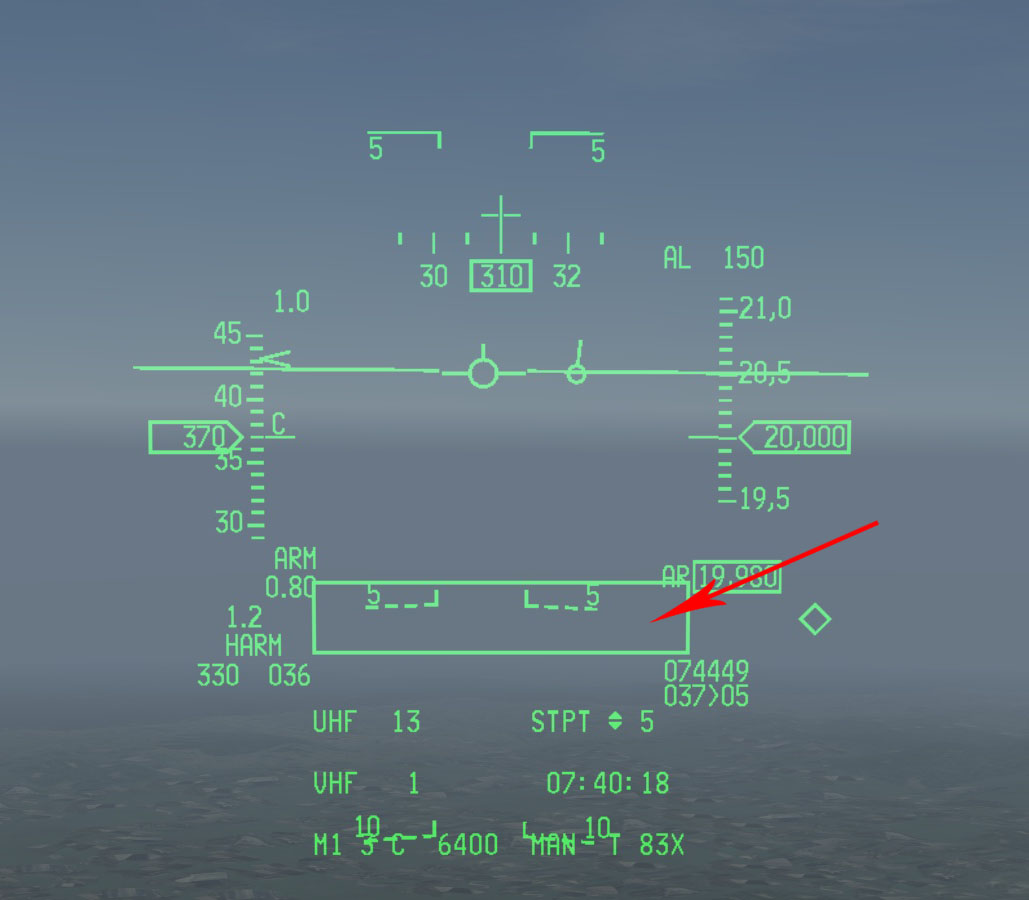
There really isn't anything special about the HUD symbology in HAS mode. The only difference from the standard NAV mode is that HARM is displayed in the lower left and the HARM seeker FOV box is displayed in the bottom center.
Designating a Target
Designating a target is very simple. Just slew the cursor over the threat to be targeted and press TMS-up. The HAS page will then appear as the image on the right. When RDY appears in the bottom center of the page the target is within range and you are ready to fire.

