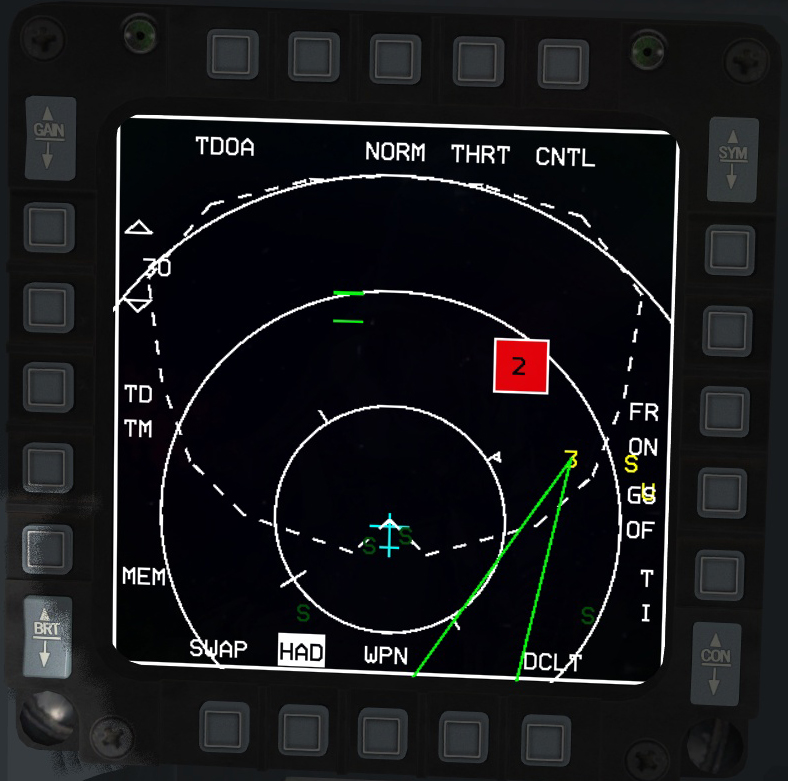
HAD
Contents
Overview
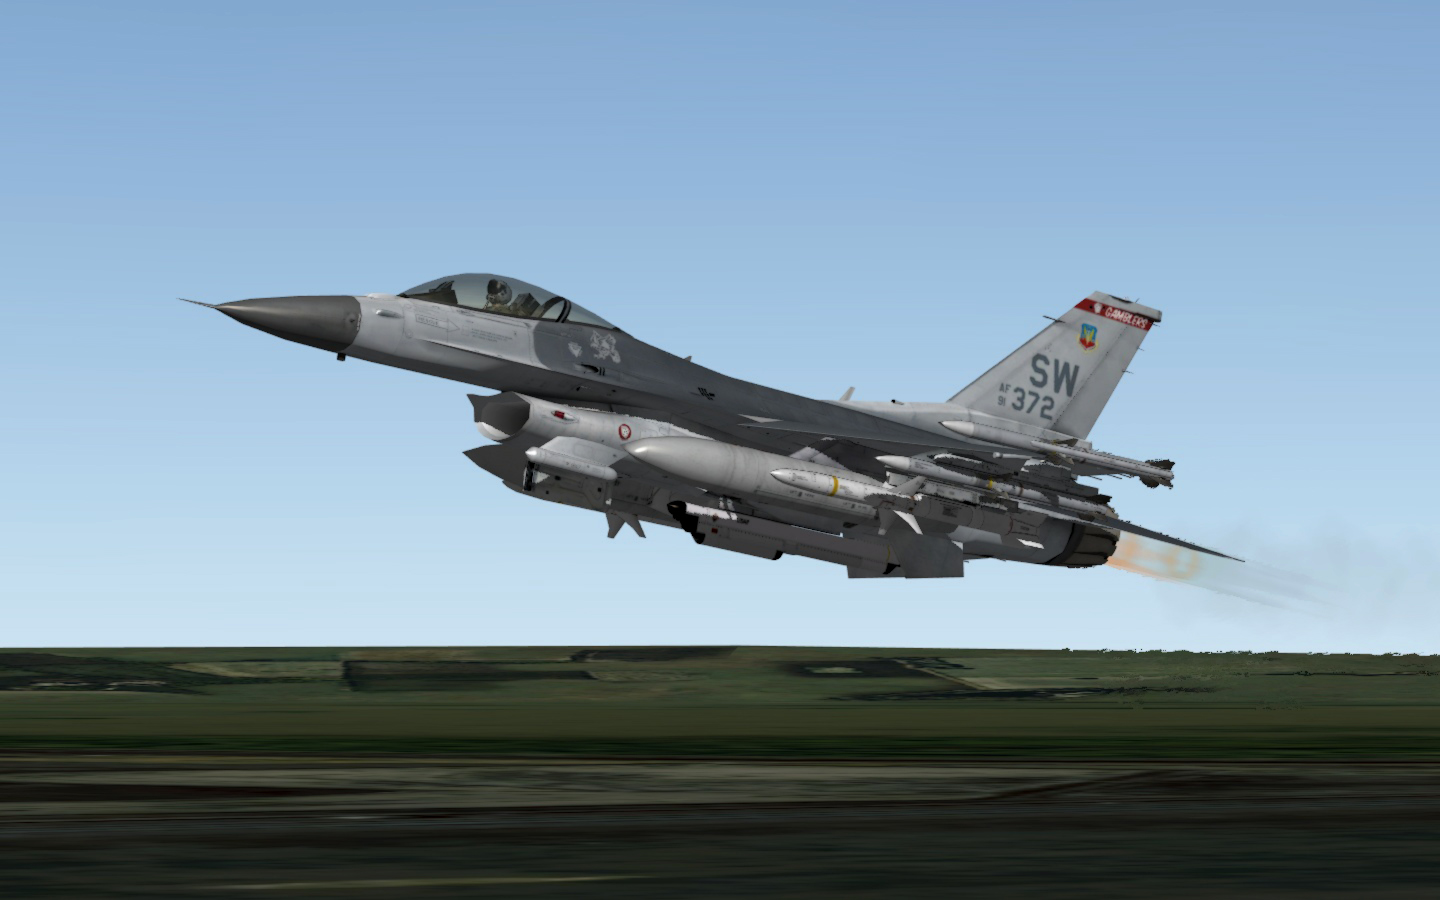
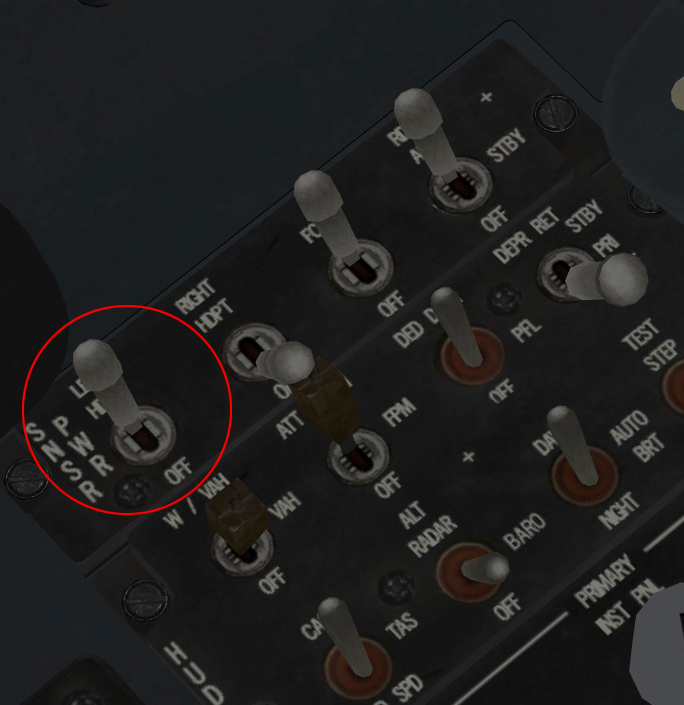
The HAD (Harm Attack Display) is used in conjunction with the HTS (Harm Targeting System) pod, which is typically loaded on the left cheek of the air intake. Because the HAD is linked with the HTS pod, the pod must be powered on via the LEFT HDPT switch on the SNSR PWR Panel.
- Advantages of the HAD
- Capable of making off-bore shots
- Can easily tell what threats are active, inactive, tracking, or launching
- Can help the pilot maintain or even enhance Situational Awareness
- Can be used even without HARMs as an aid to Situational Awareness, however without HARMs loaded the HAD can not be designated SOI.
- Disadvantages of the HAD
- Can sometimes be slow to slew cursors when in combat
- Difficult and sometimes impossible to hand off target when multiple radar emitters are clustered together
HARM SMS Page
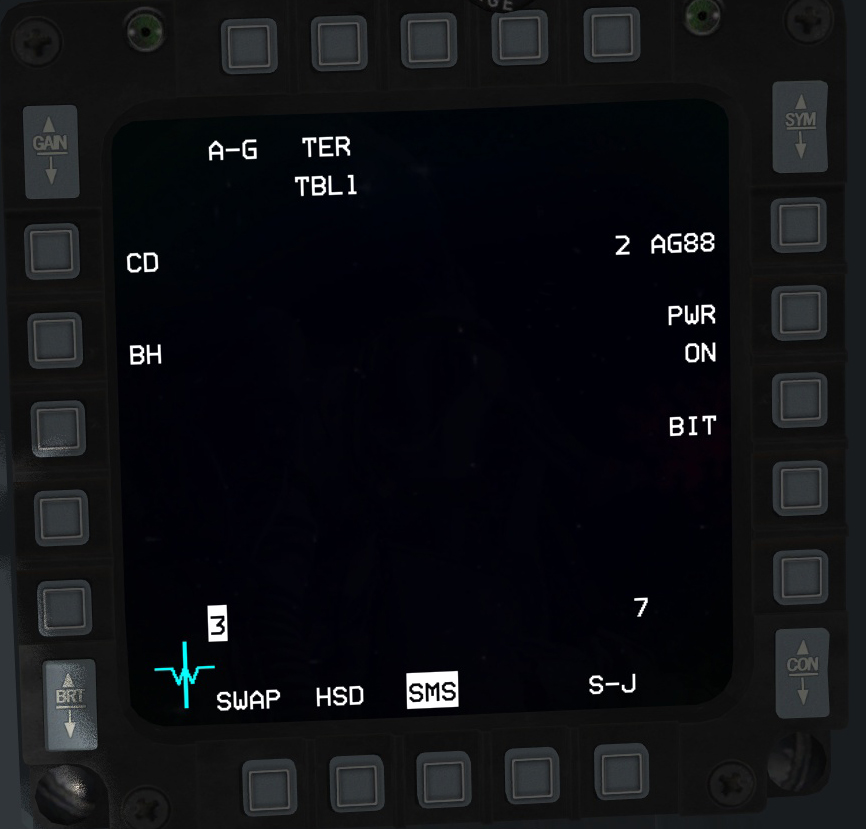
The HARM SMS page is very straightforward. OSB#7, which corresponds to PWR OFF/ON supplies power to the HARMs, and of course must be ON in order to employ the missiles.
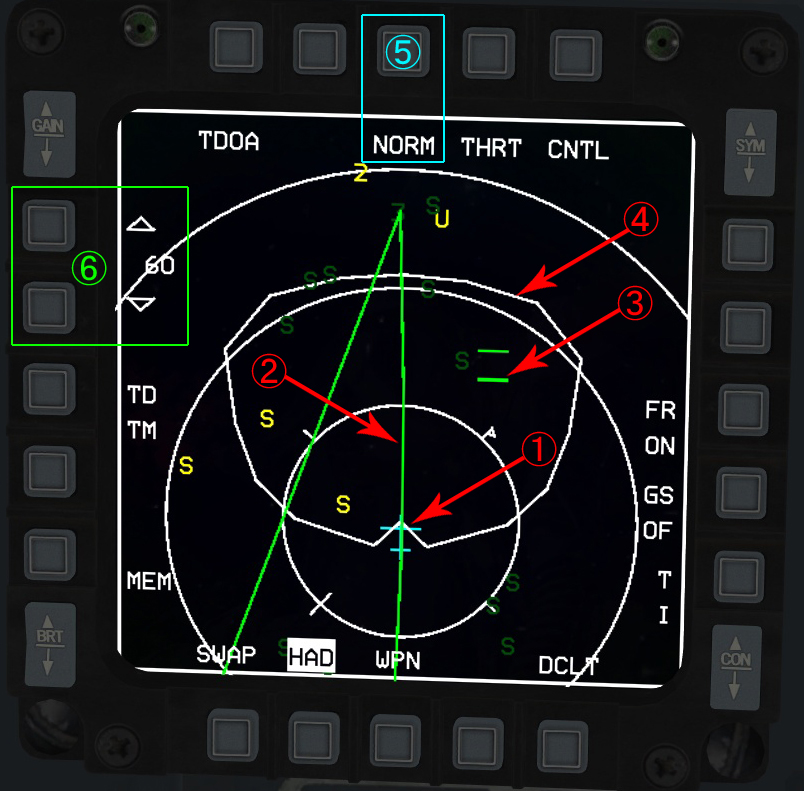
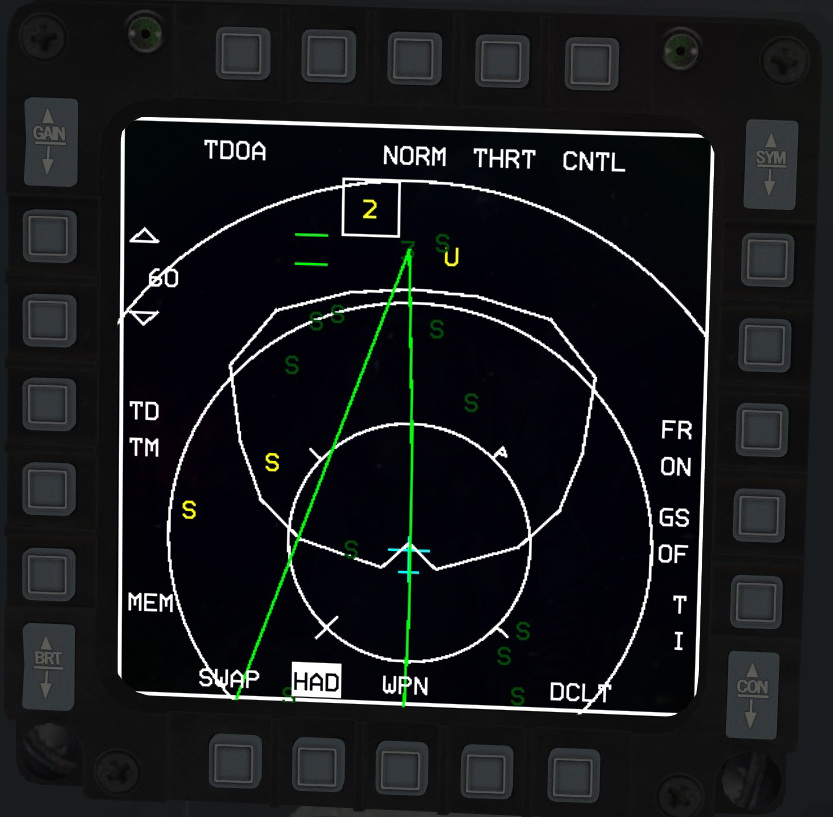
HARM HAD Page: Definitions
- 1
- Ownship indicator, displaying your current position.
- 2
- This represents your flight plan.
- 3
- The cursor for designating targets.
- 4
- This is the WEZ (Weapon Engagement Zone).
- 5
- FOV (Field of View).
- 6
- Currently selected range visible on the HAD.
WEZ
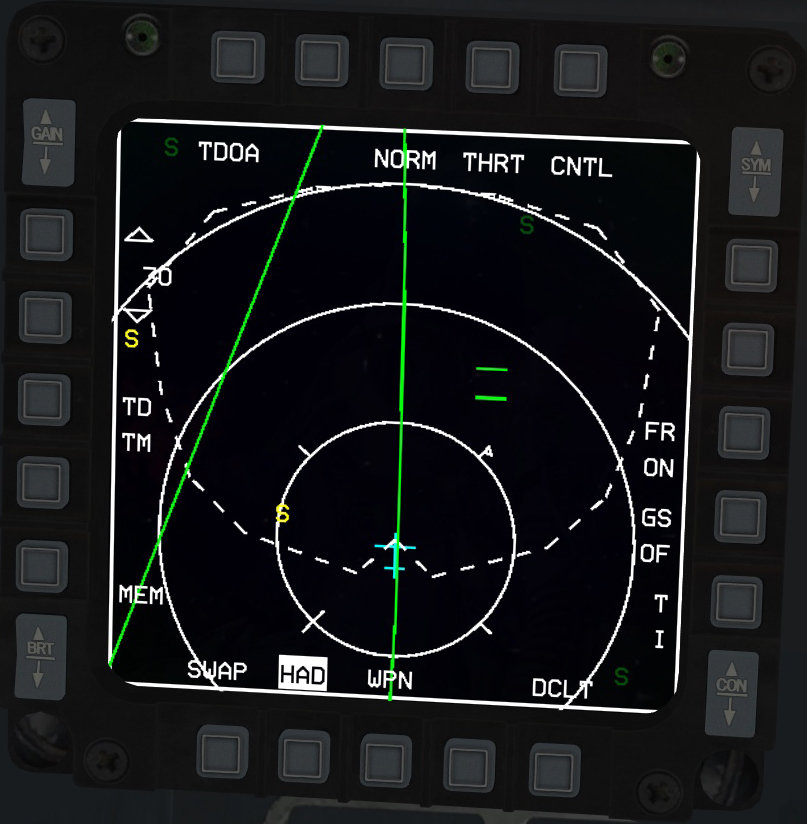
Anything that falls within the WEZ can be engaged, even if it is off-bore. However, the further off-bore a shot is, the less chance of scoring a hit you will have, and it is best to put the target directly in front of you before firing. As a general rule, you can turn your jet towards a target faster than the HARM can turn itself. Note that when the WEZ is displayed as a dashed line, it indicates that the HARM's effective range is beyond the visible range displayed in the HAD.
FOV
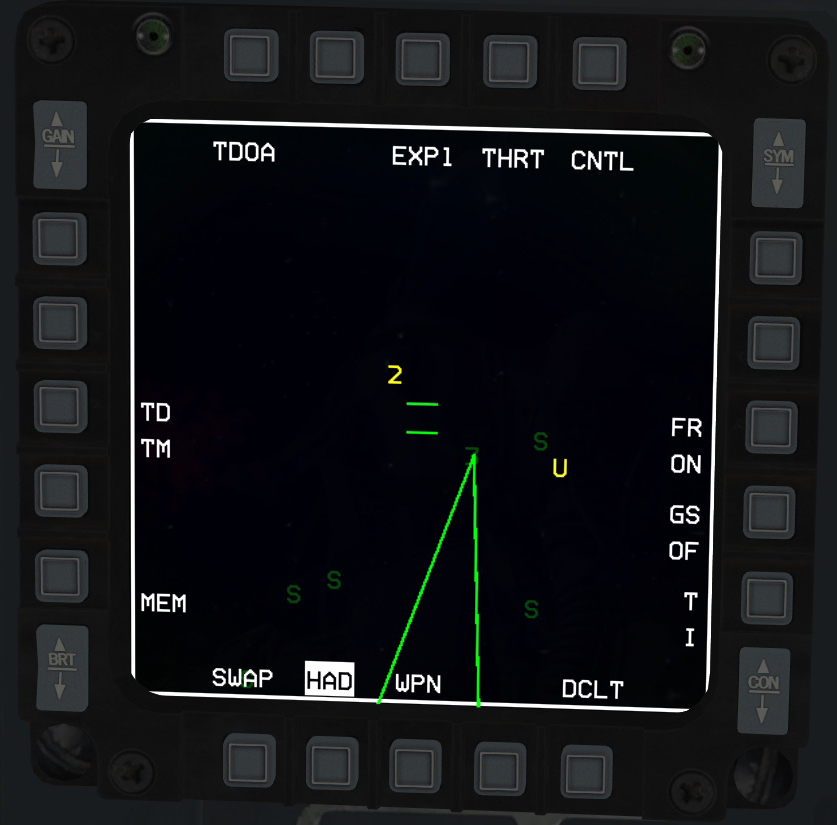
The HAD page has three FOV modes:
- NORM
- EXP1
- EXP2
These can be accessed by clicking OSB#3, which corresponds to NORM, or you can press the Pinky Switch on your HOTAS. This is very useful if you have multiple emitters cluster together.
Range Rings
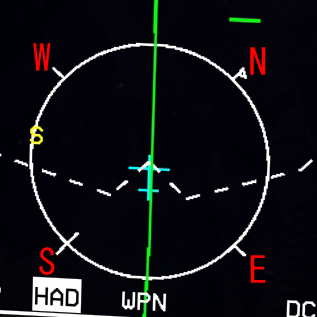
The HAD also displays three range rings, which represent one-third of your currently selected visible range. For example, if you visible range is set to 60nm, each ring will represent 20nm, and thus the inner ring represents 20nm, the middle ring 40nm, and the outer ring 60nm. The innermost ring also has direction indicators for North, South, East, and West.
HUD Symbology
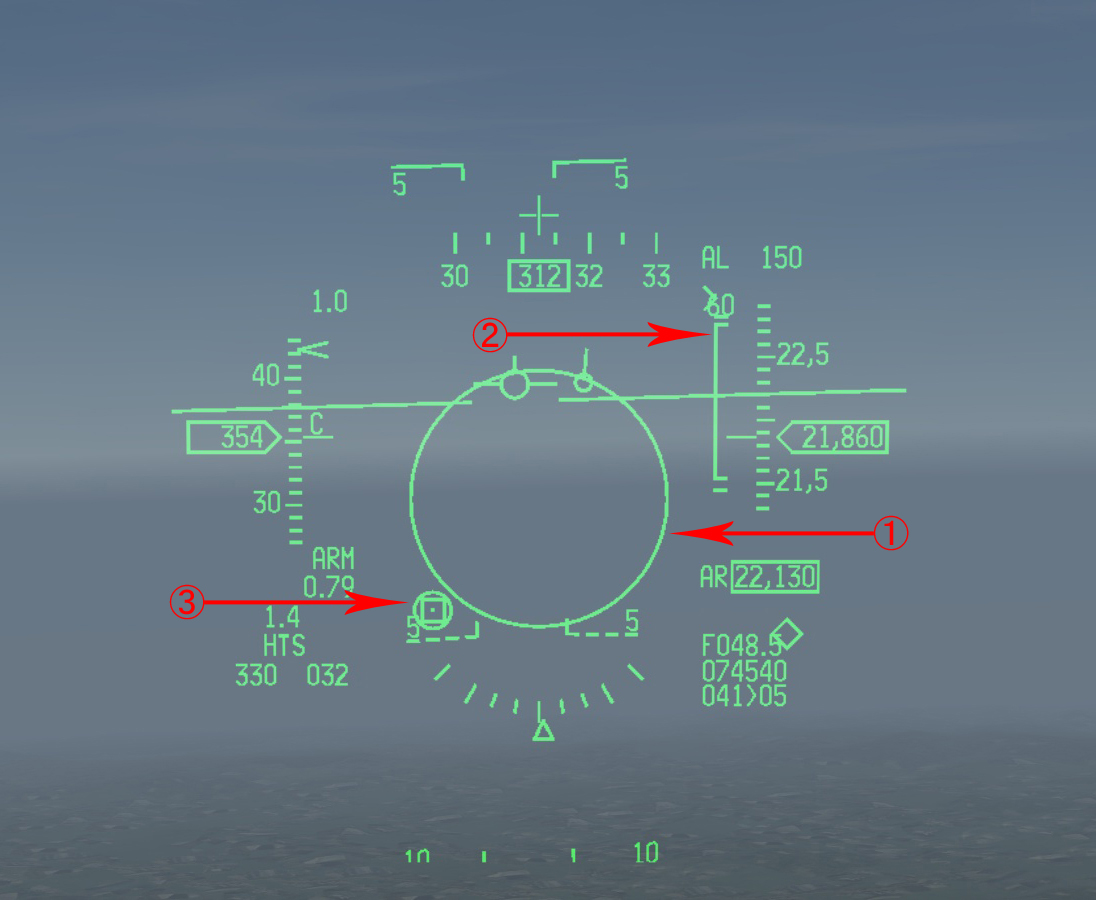
- 1
- The large circle in the middle of the HUD has no specific function other than as an indicator to the pilot that the HARMs are the currently selected weapon.
- 2
- The DLZ (Dynamic Launch Zone). The top of this bracket represents maximum range, and the bottom represents minimum range. The caret at the top will move up and down the DLZ, and the number at the top (60) indicates the currently selected view range on the HSD and is only visible when the target you have designated is out of range, as in this example.
- 3
- The box surrounded by a circle indicates the currently designated target.
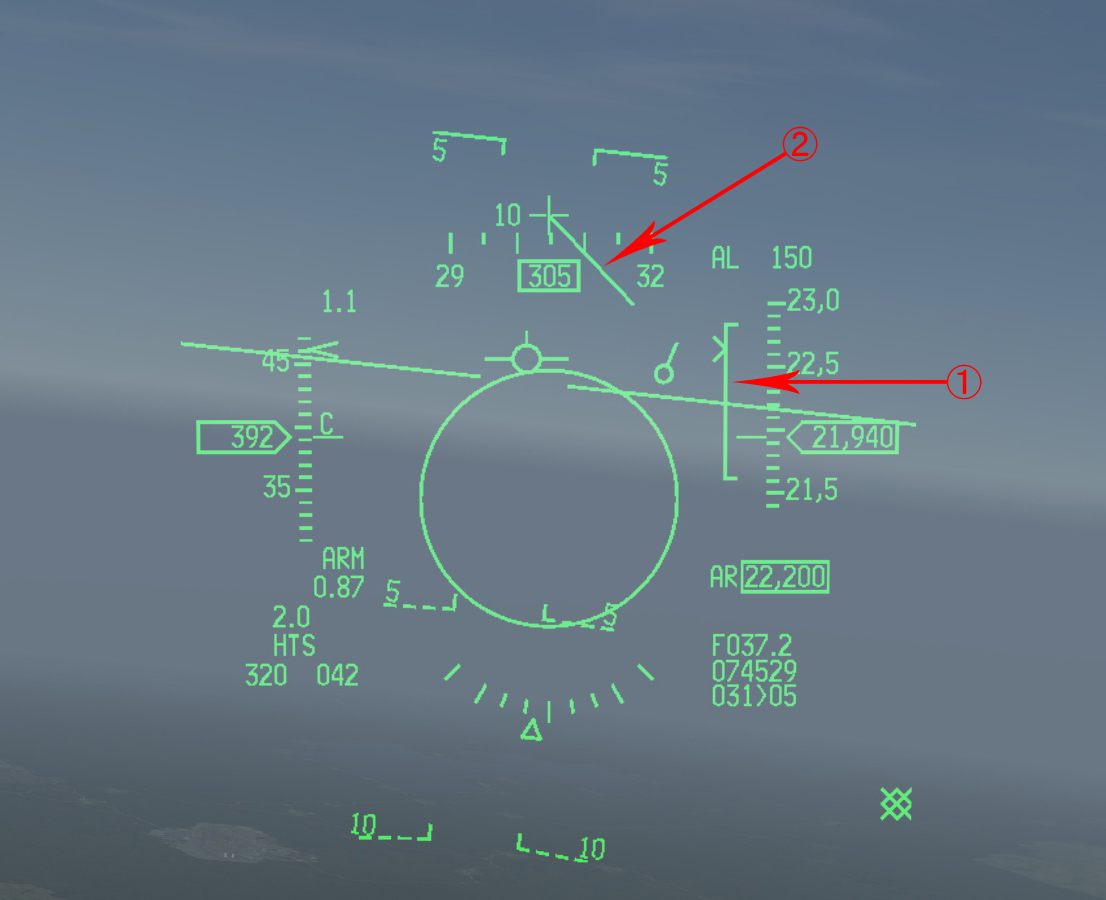
- 1
- DLZ caret indicates the target is in range.
- 2
- A line extending from the gun cross will point to the direction of the target if it is off of the HUD's view.
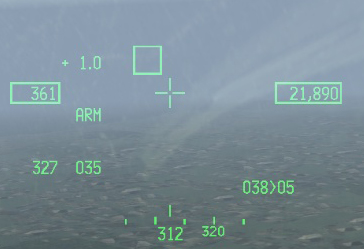
When in range, the large circle in the center of the HUD and the circle around the target will flash.
Employment
Using the HAD is very straightforward. Radars that are detected by the HTS pod will appear as a colored number or letter indicating what type of radar it is:
- Green
- Radar inactive. Chance of HARM hitting target slim to none.
- Yellow
- Radar active. Chance of HARM hitting target decent.
- Solid Red
- Radar tracking ownship or another aicraft. Chance of HARM hitting target high.
- Flashing Red
- Radar launching/supporting missile launched at ownship or another aircraft. Highest chance of hitting target with HARM.
Designating a Target
Designating a target is done by simply slewing the cursor over the emitting radar and pressing TMS-up. TMS-down will un-designate a target, however you do not need to un-designate a target before designating a different target.
Target Symbols
Underlined threats are those you will most often be engaging. Some threats, like the SA-8, SA-13 and SA-15 are mobile systems that can be engaged but you are not likely to hit them and I personally consider those a waste of a HARM. The effectiveness on shots against AAA Fire-Can radars is also debatable.
The Chun-ma, Hawk, Nike, and Patriot are friendly systems and you will not be engaging those unless playing a PvP scenario in which you are Red Force (the enemy).
2: SA-2
3: SA-3
4: SA-4
5: SA-5
6: SA-6
8: SA-8
10: SA-10
11: SA-11
13: SA-13
15: SA-15
17: SA-17
19: SA-19
A: AAA
C: Chun-ma
H: Hawk ADS
N: Nike Hercules
P: Patriot ADS
S: Search Radar
U: Unknown

